Creating an event from a timetable means that the new event will automatically take on the resource selected from the timetable itself (for example: if a course timetable is selected then the event will take on the selected course and if a room timetable is selected, the event will take on the selected room). This means that you can quickly create events for a particular course, room, staff member or learner. For the purpose of the below steps, a course timetable has been used as an example.
To create a new event from a timetable:
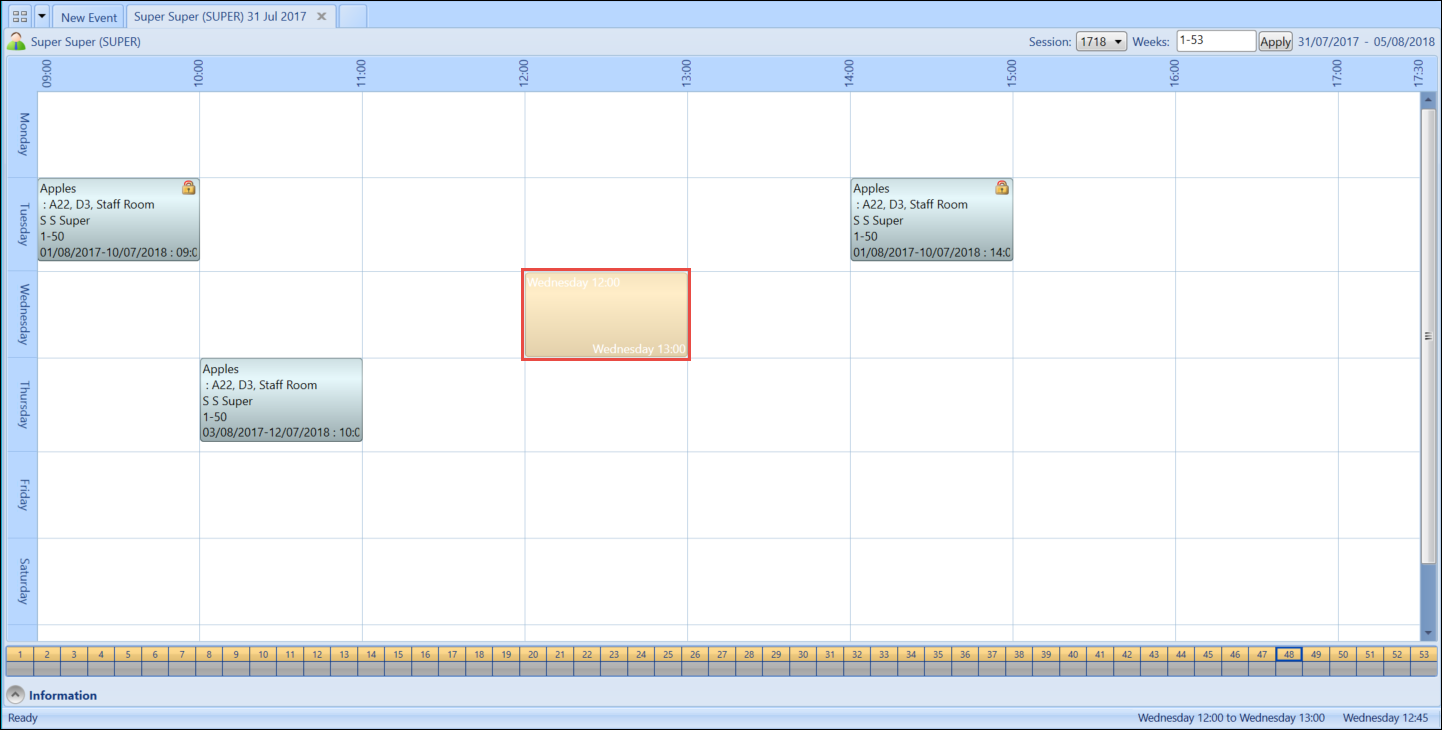
- Open the required timetable. See Open a Timetable for further information.
-
Select and drag the relevant section of the timetable grid to create an event box.
-
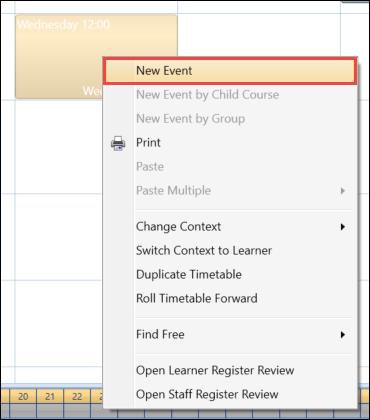
Select and hold (or right-click) on the event box and select the New Event option.
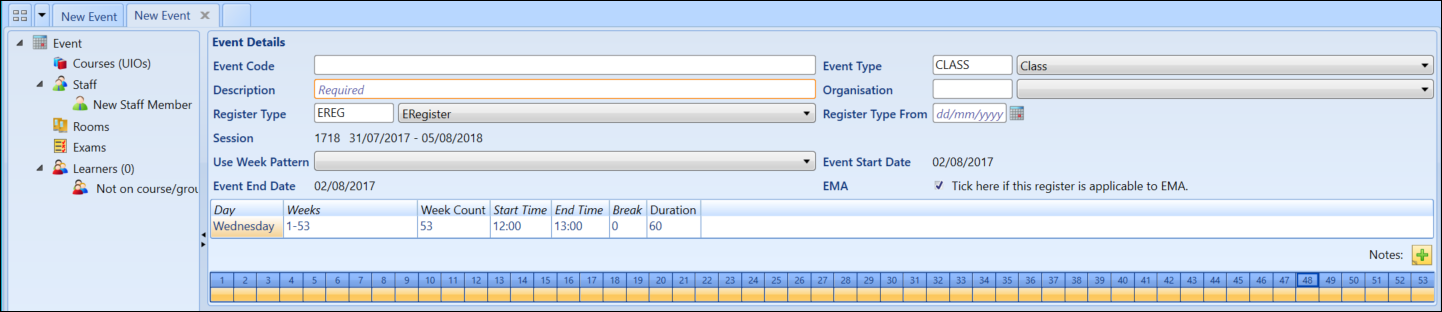
The Register Event screen is displayed.
-
Enter the relevant details for the event.
The fields on the Register Event screen are described in the following table.
| This field | Holds this information... |
|---|---|
| Event Code |
The event code for this event. Important.The event code is system generated only when the event has
been created from a course timetable. The system generated code
consists of the course code, the occurrence code, then the sequence number (starting at 1), separated by hyphens, for example: MUSBTC3P01-1718-6. This can be edited if required.
|
| Event Type |
The type of event being recorded. This will default to the event type specified in Institution Settings. To change this, select the relevant option from the drop-down list. Important.This is a required field.
|
| Description |
A description of the event. This will default to the course (UI) description of the timetabled course only when the event has been created from a course timetable. To change this, clear the field and type the required description. Important.This is a required field.
|
| Organisation |
The organisation which the event is attached to. To define an organisation, select the required option from the drop-down list. Important.Only organisations in which you are assigned to will be available
to select.
|
| Register Type |
The type of register the event should use. Select one of the following options from the drop-down list:
You can enter marks directly in to the register event using Shape regardless of the register type set. |
| Register Type From | The date which the register type should be set from. This should only be entered if the register type should start after the start week in the selected week pattern. |
| Use Week Pattern | The week pattern that the event should use. Select the required option from the drop-down list. |
| EMA |
Whether the event is included in EMA. |
-
Select the Save button to save the event.
 Important.You can also save the event by selecting the Save option in the File menu.
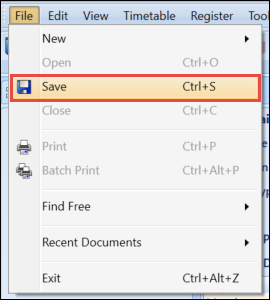
On saving the event you can see that the course from the timetable grid has been automatically attached to the event. If the event had been created from a room event, then the selected room would be automatically added to the event instead. The same logic applies for both staff and learner timetables.
Important.It is possible to add multiple courses to one event.